Notifiers
Notifiers are endpoints that receive alert notifications when monitor conditions are triggered. This guide explains each supported notifier type and provides step-by-step configuration instructions.
Supported Notifiers
Slack
To send notifications to Slack, you'll need an incoming webhook URL. There are two methods to create one:
- Slack Apps
- Incoming Webhooks (Legacy)
Slack Apps
Follow these steps to create an incoming webhook using Slack Apps. For more details, see the official Slack documentation on incoming webhooks.
-
Create a Slack App:
- Visit https://api.slack.com/apps?new_app=1
- Choose a name for your app
- Select your workspace
- Click Create App
-
Enable incoming webhooks:
- Open the Apps management dashboard
- Select your app
- Click on Incoming Webhooks
- Toggle Activate Incoming Webhooks to ON
-
Create a webhook:
- Click Add New Webhook to Workspace
- Select the channel for receiving messages
- Click Authorize
You'll receive a webhook URL that looks like this:
https://hooks.slack.com/services/T00000000/B00000000/XXXXXXXXXXXXXXXXXXXXXXXX
Webhooks created through Slack Apps can only post to their designated channel. You'll need separate webhooks for different channels.
Incoming WebHooks App (Legacy)
The legacy Incoming WebHooks app allows you to create webhooks that can send messages to any channel in your workspace.
-
Install the Incoming WebHooks app to your workspace
-
Click Add to Slack, select a default channel, then click Add Incoming WebHooks Integration
Legacy webhooks can send messages to any channel in your workspace, unlike Slack Apps webhooks which are channel-specific.
Configuration
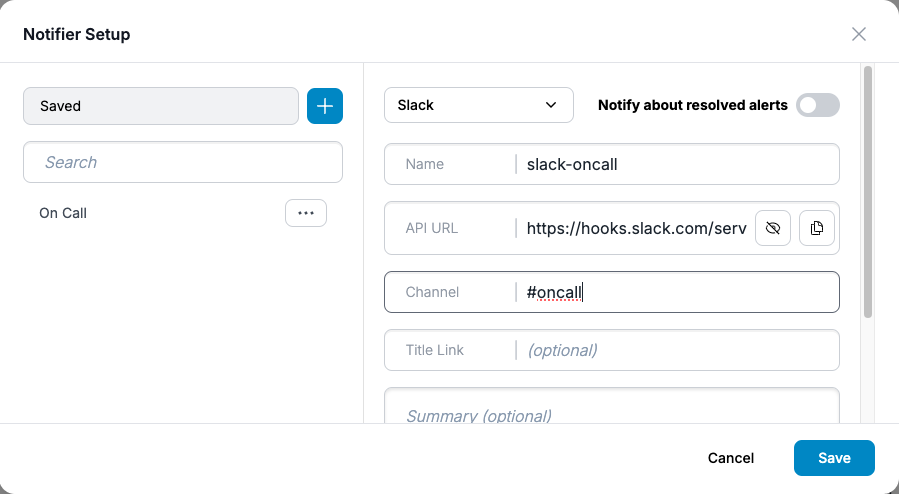
To set up a Slack notifier in Oodle:
-
Navigate to Alerts (Bell icon in sidebar) → click the ellipsis (...) → select Notifiers
-
Click the + icon and choose Slack from the dropdown
-
Fill in the following:
- Name: A descriptive name for your notifier
- API URL: The URL from Slack
- Channel (optional): Override the default channel. Note: This only works with legacy webhooks
noteFor Slack Apps webhooks, messages will always go to the channel specified during webhook creation, regardless of the channel setting in Oodle.
-
Click Save to create the notifier
Pagerduty
To send notifications to Pagerduty, you'll need an API Key. Oodle supports following Pagerduty Integrations:
- Events API V2 (Recommended)
- Prometheus
Events API V2 (Recommended)
Events API V2 is rich Events API in comparison to Prometheus integration. For example, it allows to set Pagerduty Alert's Severity, attach images etc. which are not possible in Prometheus integration type.
To get an Events API v2 API Key, follow:
- Log in to PagerDuty and navigate to Services in the top menu bar.
- Click on the service you are currently using, or create a new service.
- Click Integrations and then Add another integration.
- Select Events API V2 from the list of integrations.
- After creating the integration, you will be able to see the API Key for this integration.
Prometheus
Prometheus Integration is less richer in comparison to Events API V2 Integration. To get a Prometheus Integration API Key, follow:
- Log in to PagerDuty and navigate to Services in the top menu bar.
- Click on the service you are currently using, or create a new service.
- Click Integrations and then Add another integration.
- Select Prometheus from the list of integrations.
- After creating the integration, you will be able to see the API Key for this integration.
Configuration
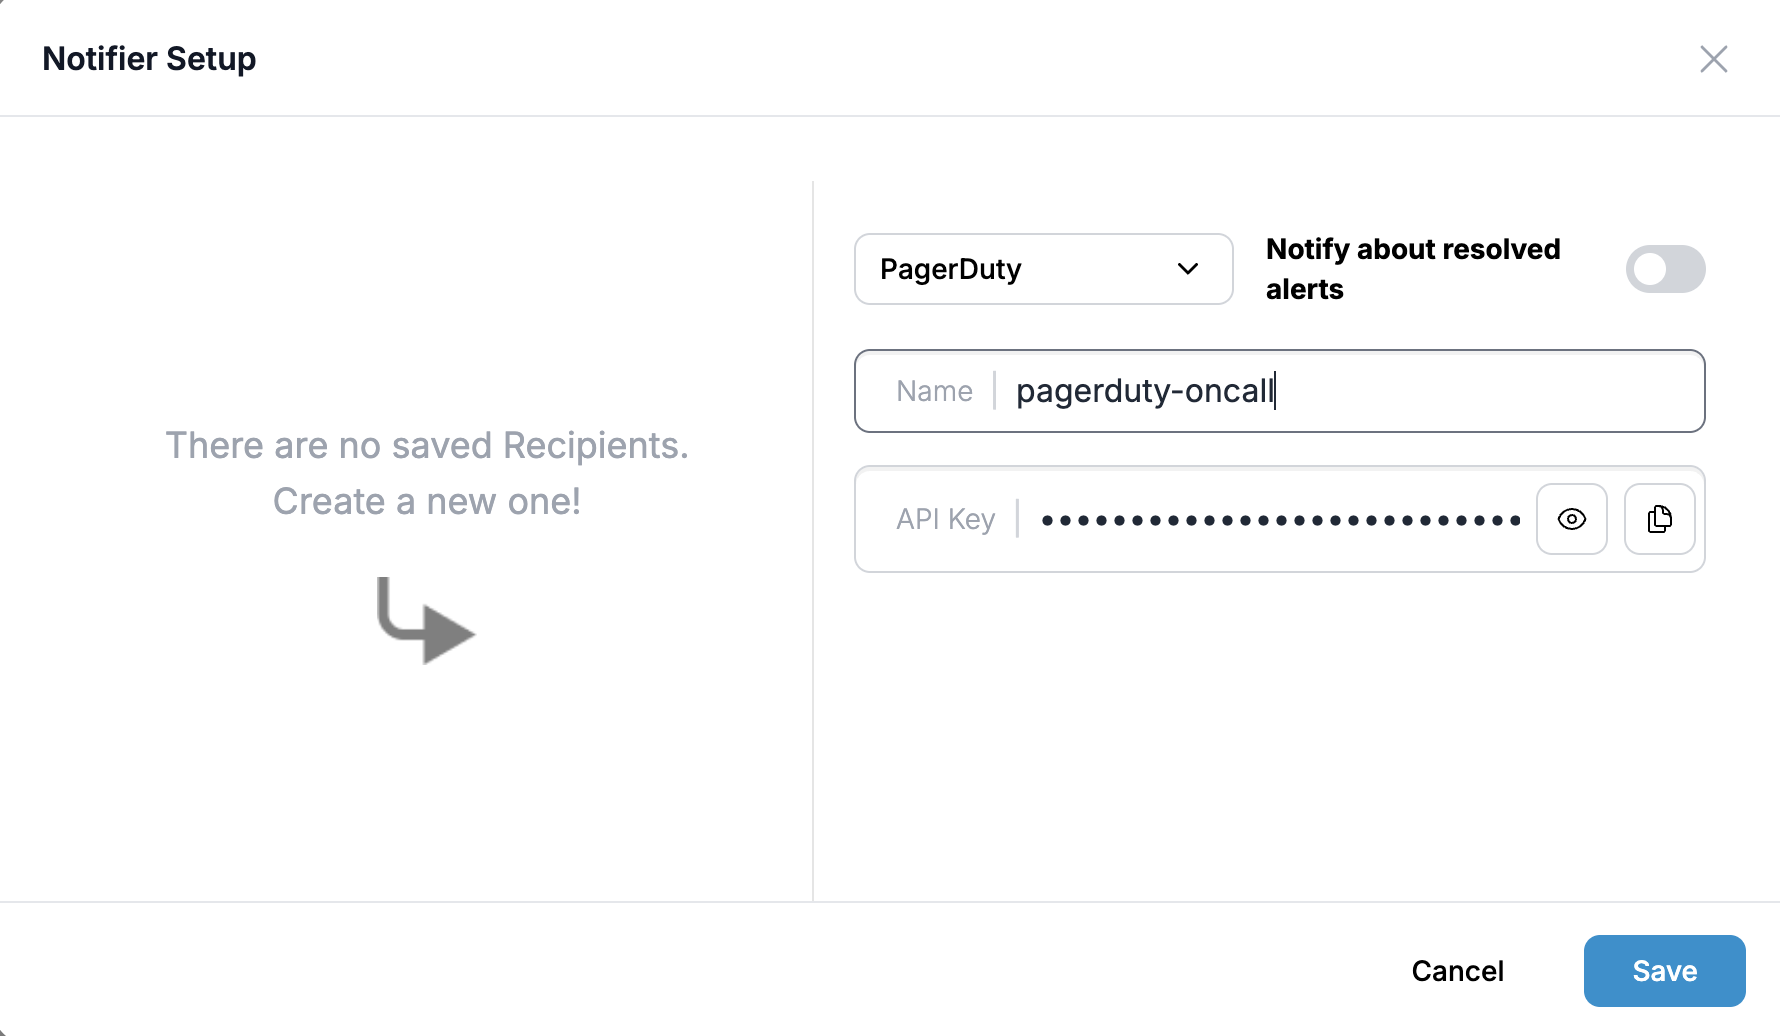
To set up a Pagerduty notifier in Oodle:
-
Navigate to Alerts (Bell icon in sidebar) → click the ellipsis (...) → select Notifiers
-
Click the + icon and choose Pagerduty from the dropdown
-
Fill in:
- Name: A descriptive name for your notifier
- Integration: Choose
Events API V2orPrometheusbased on the Integration you have configured on Pagerduty. - API Key: Your Pagerduty integration API key
-
Click Save to create the notifier
When using Events API V2, Oodle sets Pagerduty Alert's Severity
based on the Condition Severity defined within the monitor:
- Critical condition in Oodle is mapped to
criticalseverity in Pagerduty. - Warning condition in Oodle is mapped to
warningseverity in Pagerduty.
Follow Configure Dynamic notifications in Pagerduty to govern alert notifications based on Severity.
Opsgenie
To send notifications to Opsgenie, you'll need an API key. Here's how to get one:
-
Log in to Opsgenie and navigate to Integrations
-
Click Add Integration and select Prometheus
-
Configure the integration:
- Enter a name
- Select the team to receive alerts
- Click Continue
-
Click Turn on Integration to activate it
-
[Optional] In
Incoming | Rules for creating and processing alertssection, Click onCreate Alertand updateMessagefield from[Prometheus]: {{message}}to{{message}}.
Configuration
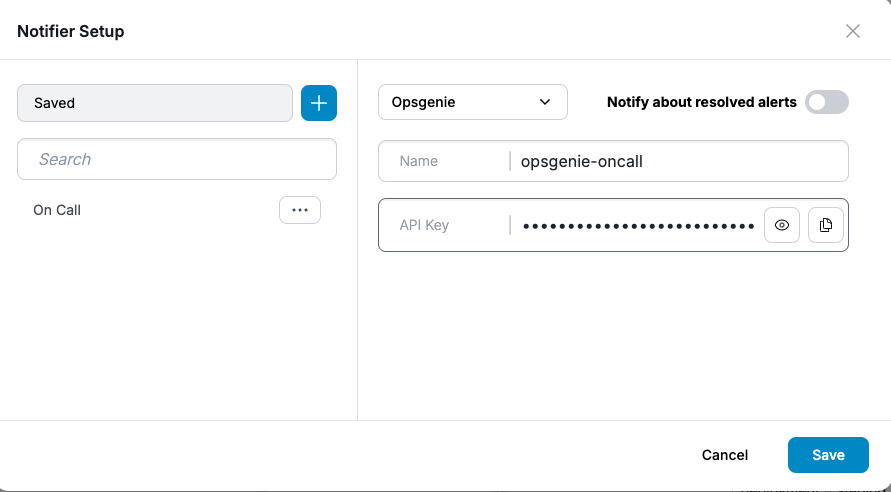
To set up an Opsgenie notifier in Oodle:
-
Navigate to Alerts (Bell icon in sidebar) → click the ellipsis (...) → select Notifiers
-
Click the + icon and choose Opsgenie from the dropdown
-
Fill in:
- Name: A descriptive name for your notifier
- API Key: Your Opsgenie integration API key
-
Click Save to create the notifier
Oodle sets Opsgenie's Priority based on the Condition Severity defined within the monitor:
- Critical condition in Oodle is mapped to
P1priority in Opsgenie. - Warning condition in Oodle is mapped to
P2priority in Opsgenie.
Rootly
To send notifications to Rootly, you'll need a Bearer Token Secret from a Rootly Alertmanager source.
-
In Rootly, navigate to Alert Sources > New Alertmanager Source
-
Give the source a name (e.g. "Oodle Alerts")
-
Under Urgency, add a condition:
$.alerts[0].labels._oodle_severityiswarnsets urgency to Medium, otherwise High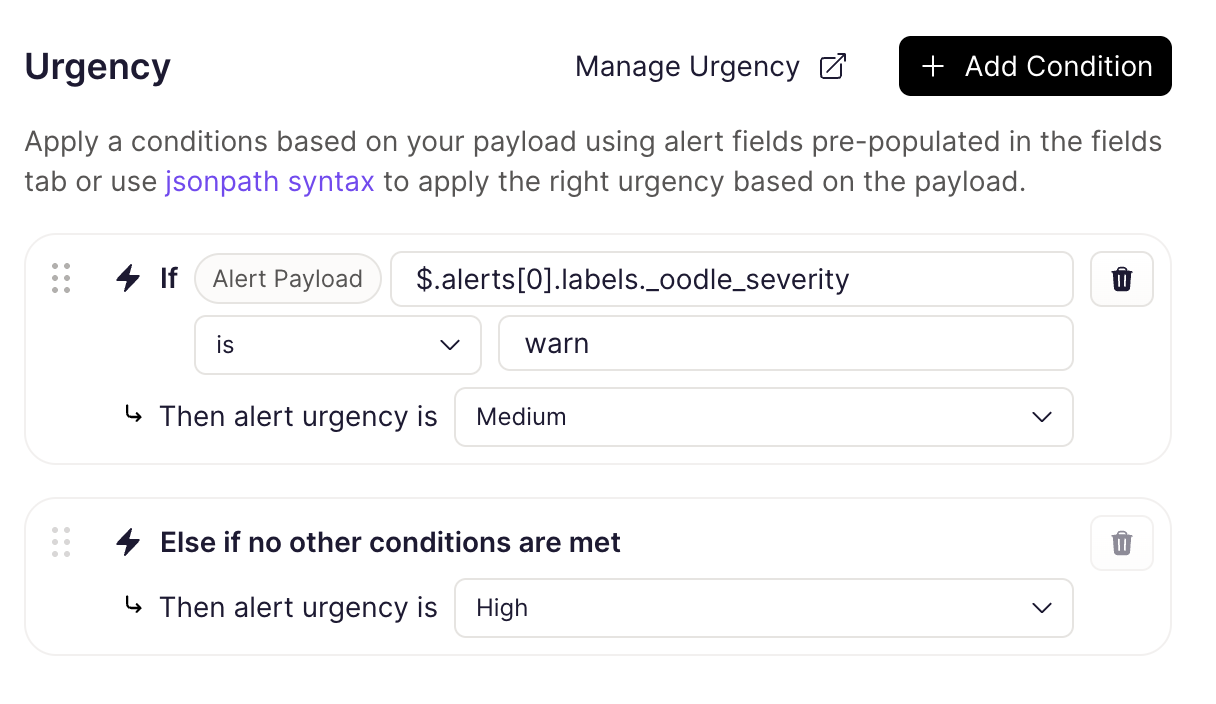
-
Save and copy the Bearer Token Secret
Configuration
To set up a Rootly notifier in Oodle:
-
Navigate to Alerts (Bell icon in sidebar) → click the ellipsis (...) → select Notifiers
-
Click the + icon and choose Rootly from the dropdown
-
Fill in:
- Name: A descriptive name for your notifier
- Bearer Token: The Bearer Token Secret from Rootly
-
Click Save to create the notifier
Oodle delivers alerts in Alertmanager webhook format. Rootly uses the _oodle_severity label to map alert urgency based on the conditions you configured above.
A Rootly notifier is a webhook underneath, so it also accepts a
Custom Payload, but with a difference. Rootly's alert
source parses the standard Alertmanager body, and the urgency condition above
reads $.alerts[0].labels._oodle_severity out of it, so Oodle keeps that body
in place: anything you add is sent alongside the standard fields rather than
replacing them. The editor names those fields below the box, and expands to
show the full body that goes out.
Oodle adds the standard fields as it delivers the alert, thus you write only your own keys, and the API and the Terraform provider behave the same way. A payload that sets one of the standard keys itself is rejected, because the value would be lost.
Two of the standard fields cannot be carried on a custom payload: groupKey is
dropped, and version is sent as the number 4 rather than the string "4".
For more details, see the Rootly Alertmanager docs.
Google Chat
To send notifications to Google Chat, you'll need a webhook URL. Get the Webhook URL by following Create a webhook for the Google Space for the Google Space you want to send notification to.
When creating the webhook in Google Chat, we recommend:
- Name:
Oodle Alerts - Avatar URL:
https://www.oodle.ai/img/logo_square.png
This gives alert messages a recognizable name and Oodle logo in Google Chat.
Configuration
To set up a Google Chat notifier in Oodle:
-
Navigate to Alerts (Bell icon in sidebar) → click the ellipsis (...) → select Notifiers
-
Click the + icon and choose Google Chat from the dropdown
-
Fill in:
- Name: A descriptive name for your notifier
- Webhook URL: The Webhook URL you created above.
-
Click Save to create the notifier.
Microsoft Teams
To send notifications to Microsoft Teams, you'll need a webhook URL. Get the Webhook URL by following Create an incoming Webhook with Workflows for the Teams Channel you want to send notifications to.
Configuration
To set up a Microsoft Teams notifier in Oodle:
-
Navigate to Alerts (Bell icon in sidebar) → click the ellipsis (...) → select Notifiers
-
Click the + icon and choose Microsoft Teams from the dropdown
-
Fill in:
- Name: A descriptive name for your notifier
- Webhook URL: The Webhook URL you created above.
-
Click Save to create the notifier
Webhook
A webhook notifier posts each alert to an HTTP endpoint you control. By default Oodle sends the standard Alertmanager webhook payload.
Configuration
To set up a webhook notifier in Oodle:
-
Navigate to Alerts (Bell icon in sidebar) → click the ellipsis (...) → select Notifiers
-
Click the + icon and choose Webhook from the dropdown
-
Fill in:
- Name: A descriptive name for your notifier
- API URL: The endpoint Oodle posts to
- Authorization Credentials (optional): Sent as a
Bearertoken in theAuthorizationheader - Custom Payload (optional): See below
-
Click Save to create the notifier
Custom Payload
If your endpoint expects a different request body, set Custom Payload to a JSON object. It replaces the default body entirely. Every string in the object (keys included, at any nesting depth) is a Go template rendered against the alert notification data, so you can shape the request to whatever the endpoint needs:
{
  "text": "{{ .CommonLabels.alertname }} is {{ .Status }}",
  "severity": "{{ .CommonLabels._oodle_severity }}",
  "labels": "{{ .CommonLabels | toJson }}",
  "sections": [{ "summary": "{{ .CommonAnnotations.summary }}" }]
}
A rendered string that itself parses as JSON is inlined as structured data
rather than quoted, which is what makes toJson useful: labels above arrives
at the endpoint as an object, not as a string containing JSON.
The payload is per notifier: each webhook notifier carries its own, and one left empty keeps the default body.
The template data is the same
Alertmanager notification data
available to the other notifier types. Expand Available Variables above the
editor for the full list: .Status, .CommonLabels.alertname,
.CommonLabels._oodle_severity, .CommonAnnotations._oodle_message,
.Alerts.Firing and the rest.
Oodle does not validate that the rendered payload is what your endpoint expects. If the template is malformed or the endpoint rejects the body, the notification fails to deliver. Use Test on the notifier after saving.
Use a Notifier
Once you have a notifier created, you can use it in a notification policy to route alerts to the notifier. See the Notification Policies documentation for more details.
Support
If you need assistance or have any questions, please reach out to us through:
- Email at [email protected]