Agents
Oodle Agents allow you to securely connect your private infrastructure to Oodle. An agent runs inside your network (typically as a Kubernetes deployment) and establishes an outbound WebSocket connection to Oodle. This tunnel lets Oodle reach resources that are not publicly accessible, such as internal APIs, databases, and services behind a firewall.
The agent is open source: github.com/oodle-ai/oodle-agent.
Use Cases
| Use Case | Description |
|---|---|
| Private endpoint monitoring | Run synthetic checks against internal HTTP endpoints, DNS, TCP, Ping, SSL, and Traceroute targets that are not reachable from the public internet |
| Private database datasources | Connect Grafana to Postgres databases inside your VPC without exposing them publicly |
How It Works
- You create an agent in the Oodle UI and receive a one-time registration token
- You deploy the agent into your Kubernetes cluster using Helm
- On first connection the agent uses the registration token to obtain a client certificate via mTLS
- The agent opens a persistent WebSocket connection to Oodle
- Oodle routes requests (synthetic checks, database queries) through the tunnel to your private infrastructure
All traffic is encrypted in transit using mutual TLS (mTLS). The agent authenticates with a client certificate, and Oodle authenticates via its server certificate pinned to the Amazon CA.
Creating an Agent
Creating an agent requires the Admin role. Users with the Editor or Viewer role cannot create or manage agents.
- Navigate to Agents in the sidebar
- Click Create Agent
- Enter a descriptive name (e.g.
production-cluster,staging-vpc) - Click Create
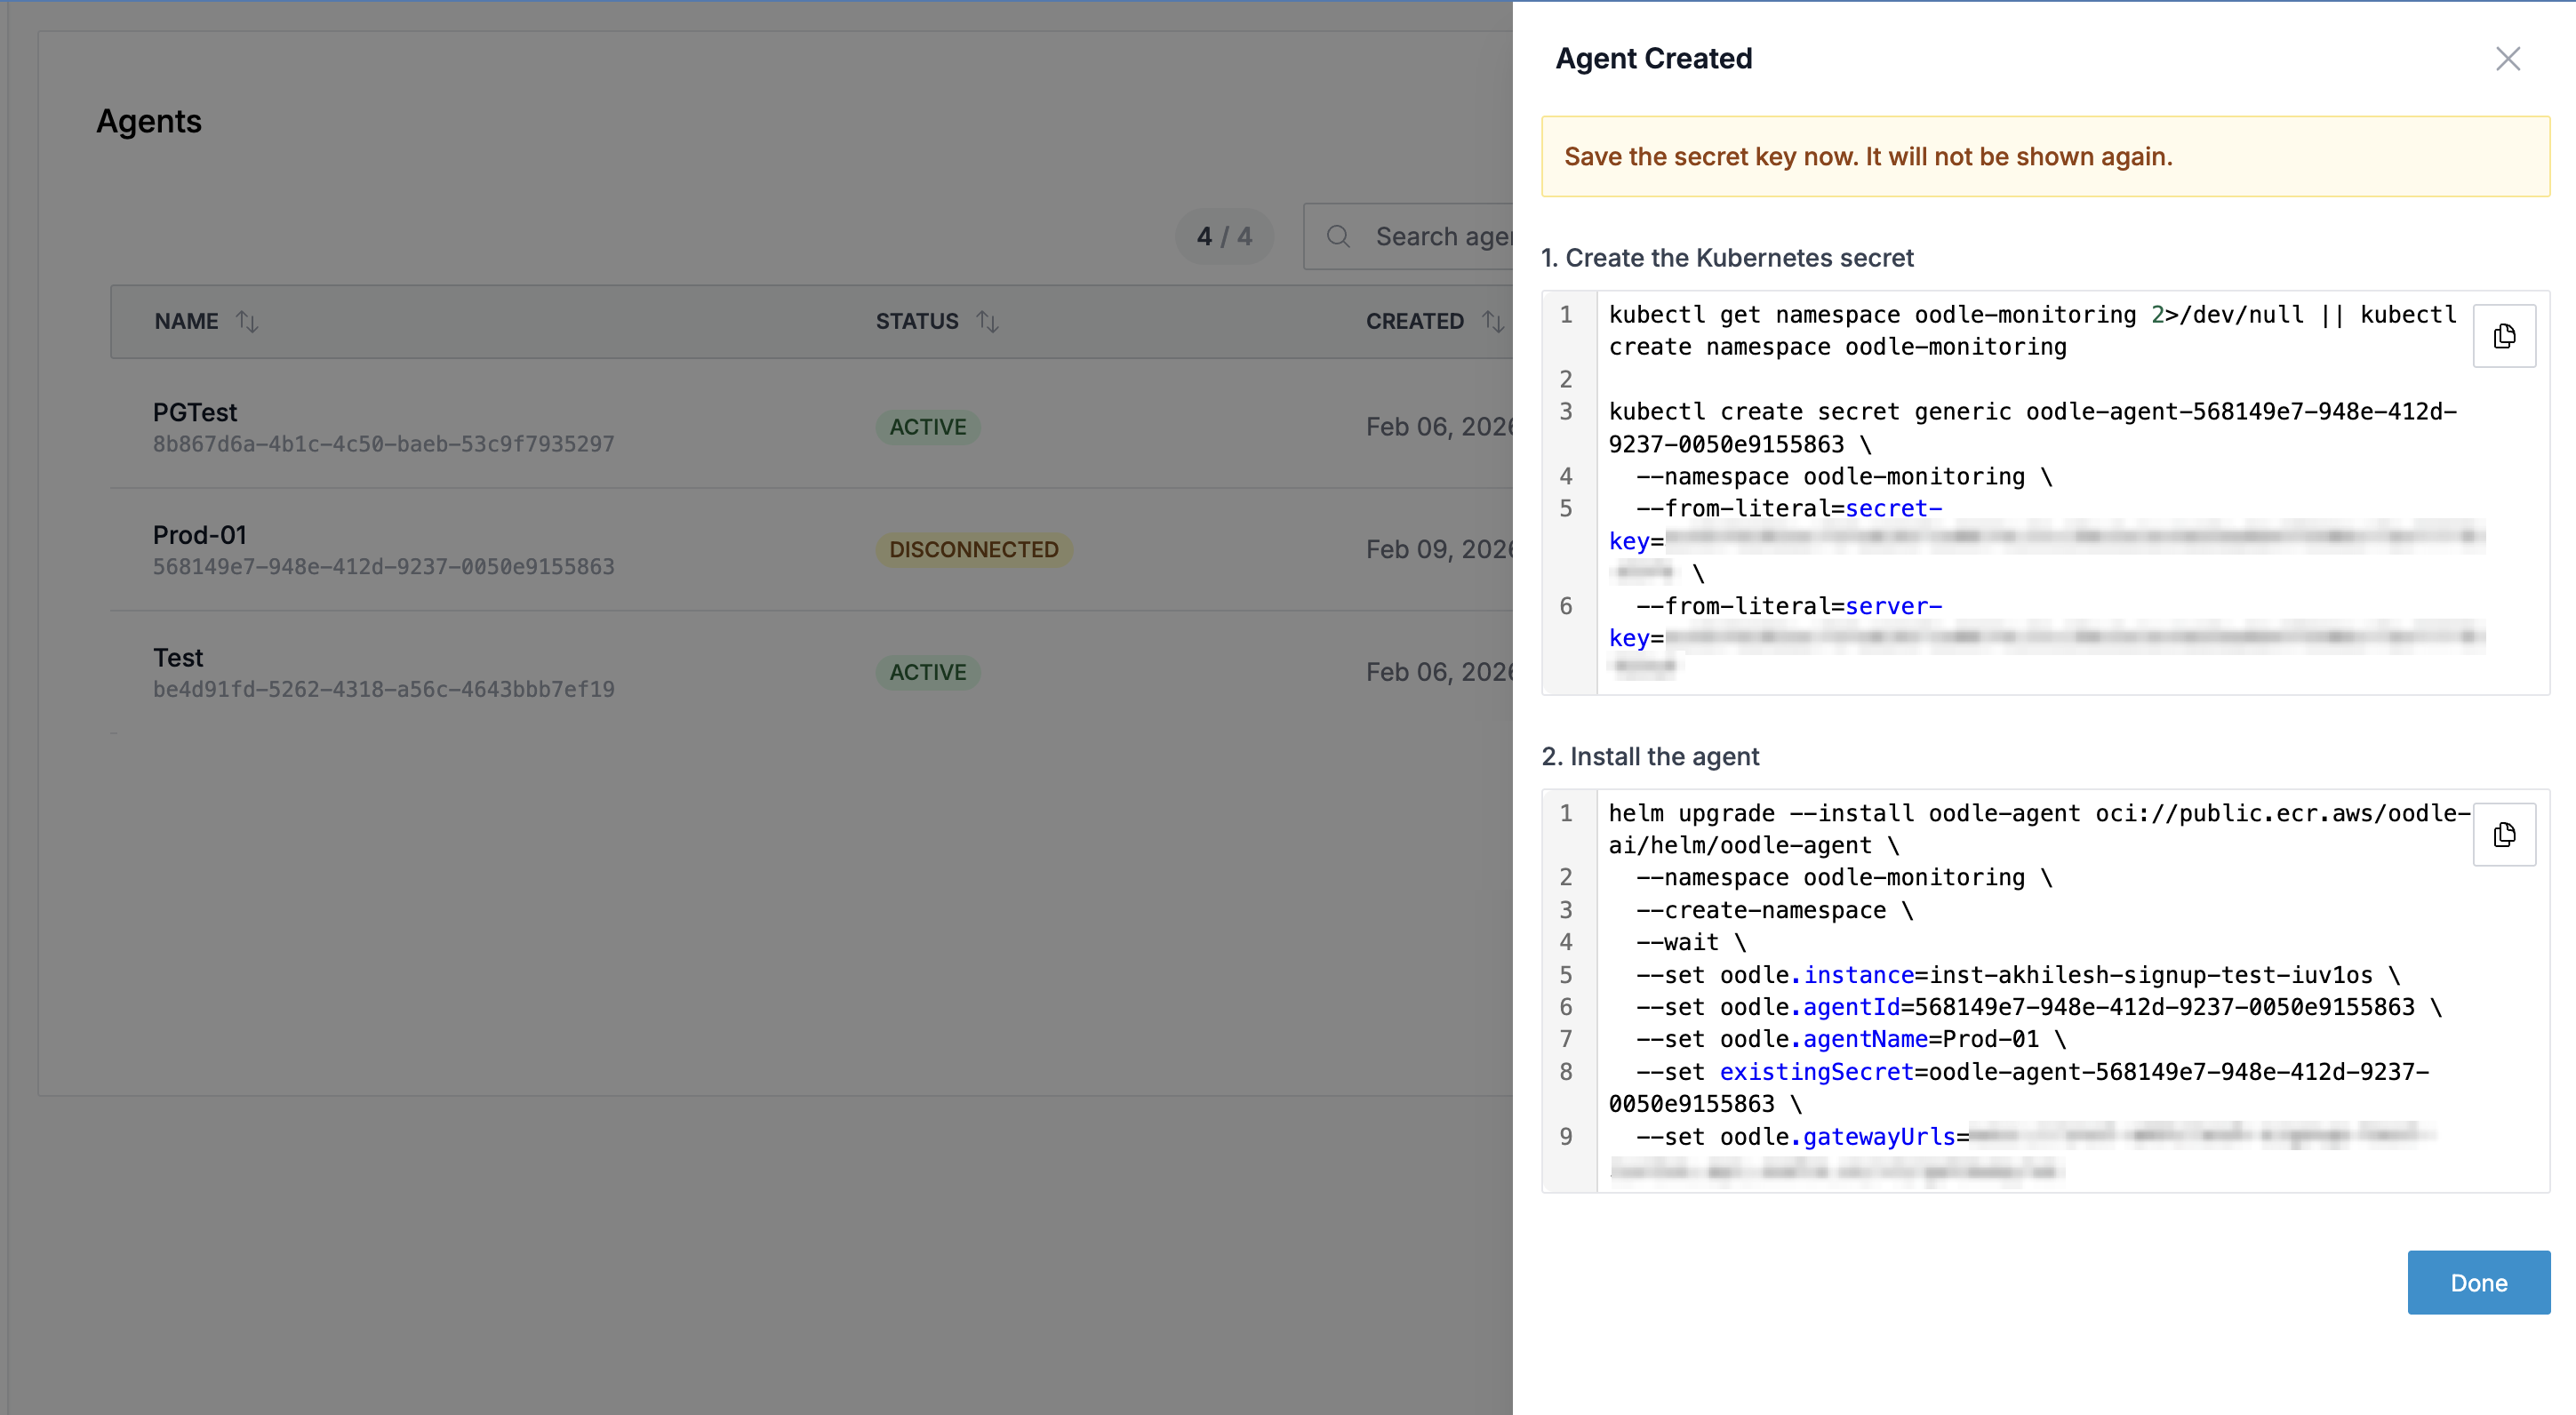
After creation, you will see two commands that must be run in order. Save the registration token immediately — it is single-use and expires in 24 hours.
Step 1: Create the Kubernetes Secret
The first command creates a namespace and a Kubernetes secret containing the agent's one-time registration token:
kubectl get namespace oodle-monitoring 2>/dev/null || \
  kubectl create namespace oodle-monitoring

kubectl create secret generic oodle-agent-<agent-id> \
  --namespace oodle-monitoring \
  --from-literal=registration-token=<registration-token>
Step 2: Install the Agent via Helm
The second command deploys the agent using the official Helm chart:
helm repo add oodle-ai https://oodle-ai.github.io/helm-charts
helm repo update

helm upgrade --install oodle-agent oodle-ai/oodle-agent \
  --namespace oodle-monitoring \
  --create-namespace \
  --wait \
  --set oodle.instance=<instance> \
  --set oodle.agentId=<agent-id> \
  --set oodle.agentName=<agent-name> \
  --set existingSecret=oodle-agent-<agent-id> \
  --set oodle.gatewayUrls=wss://<oodle-domain>/ws
Both commands are pre-filled with the correct values in the UI. You can copy them directly.
On its first connection, the agent uses the registration token to submit a Certificate Signing Request (CSR) and receives a signed client certificate. All subsequent connections use mutual TLS (mTLS) — the registration token is automatically consumed and no longer needed.
Step 3: Restrict Allowed Endpoints (Optional)
By default the agent can reach any endpoint in your network. To restrict which
hosts the agent is allowed to connect to, add the policy values to the Helm
install command:
helm repo add oodle-ai https://oodle-ai.github.io/helm-charts
helm repo update

helm upgrade --install oodle-agent oodle-ai/oodle-agent \
  --namespace oodle-monitoring \
  # ... same flags as above ...
  --set policy.enable_access_restrictions=true \
  --set "policy.allowed_endpoints[0]=my-postgres.internal:5432" \
  --set "policy.allowed_endpoints[1]=*.prod.internal:443" \
  --set "policy.allowed_endpoints[2]=10.0.1.50:8080"
Supported endpoint patterns:
| Pattern | Description |
|---|---|
host:port | Exact match (e.g. my-db.internal:5432) |
host | Any port on that host |
*.example.com:443 | Wildcard subdomain with specific port |
*:5432 | Any host on a specific port |
The policy is enforced for all protocols: HTTP, Postgres, TCP, Ping, DNS, SSL, and Traceroute.
You can also restrict which Kubernetes namespaces and resources the agent can read:
  --set "policy.kubernetes.allowed_namespaces[0]=production" \
  --set "policy.kubernetes.allowed_namespaces[1]=monitoring" \
  --set "policy.kubernetes.deny_resources[0]=secrets"
To update the policy after installation, run helm upgrade with the new
values, or edit the oodle-agent-policy ConfigMap directly and restart the
agent pod.
Viewing Agent Status
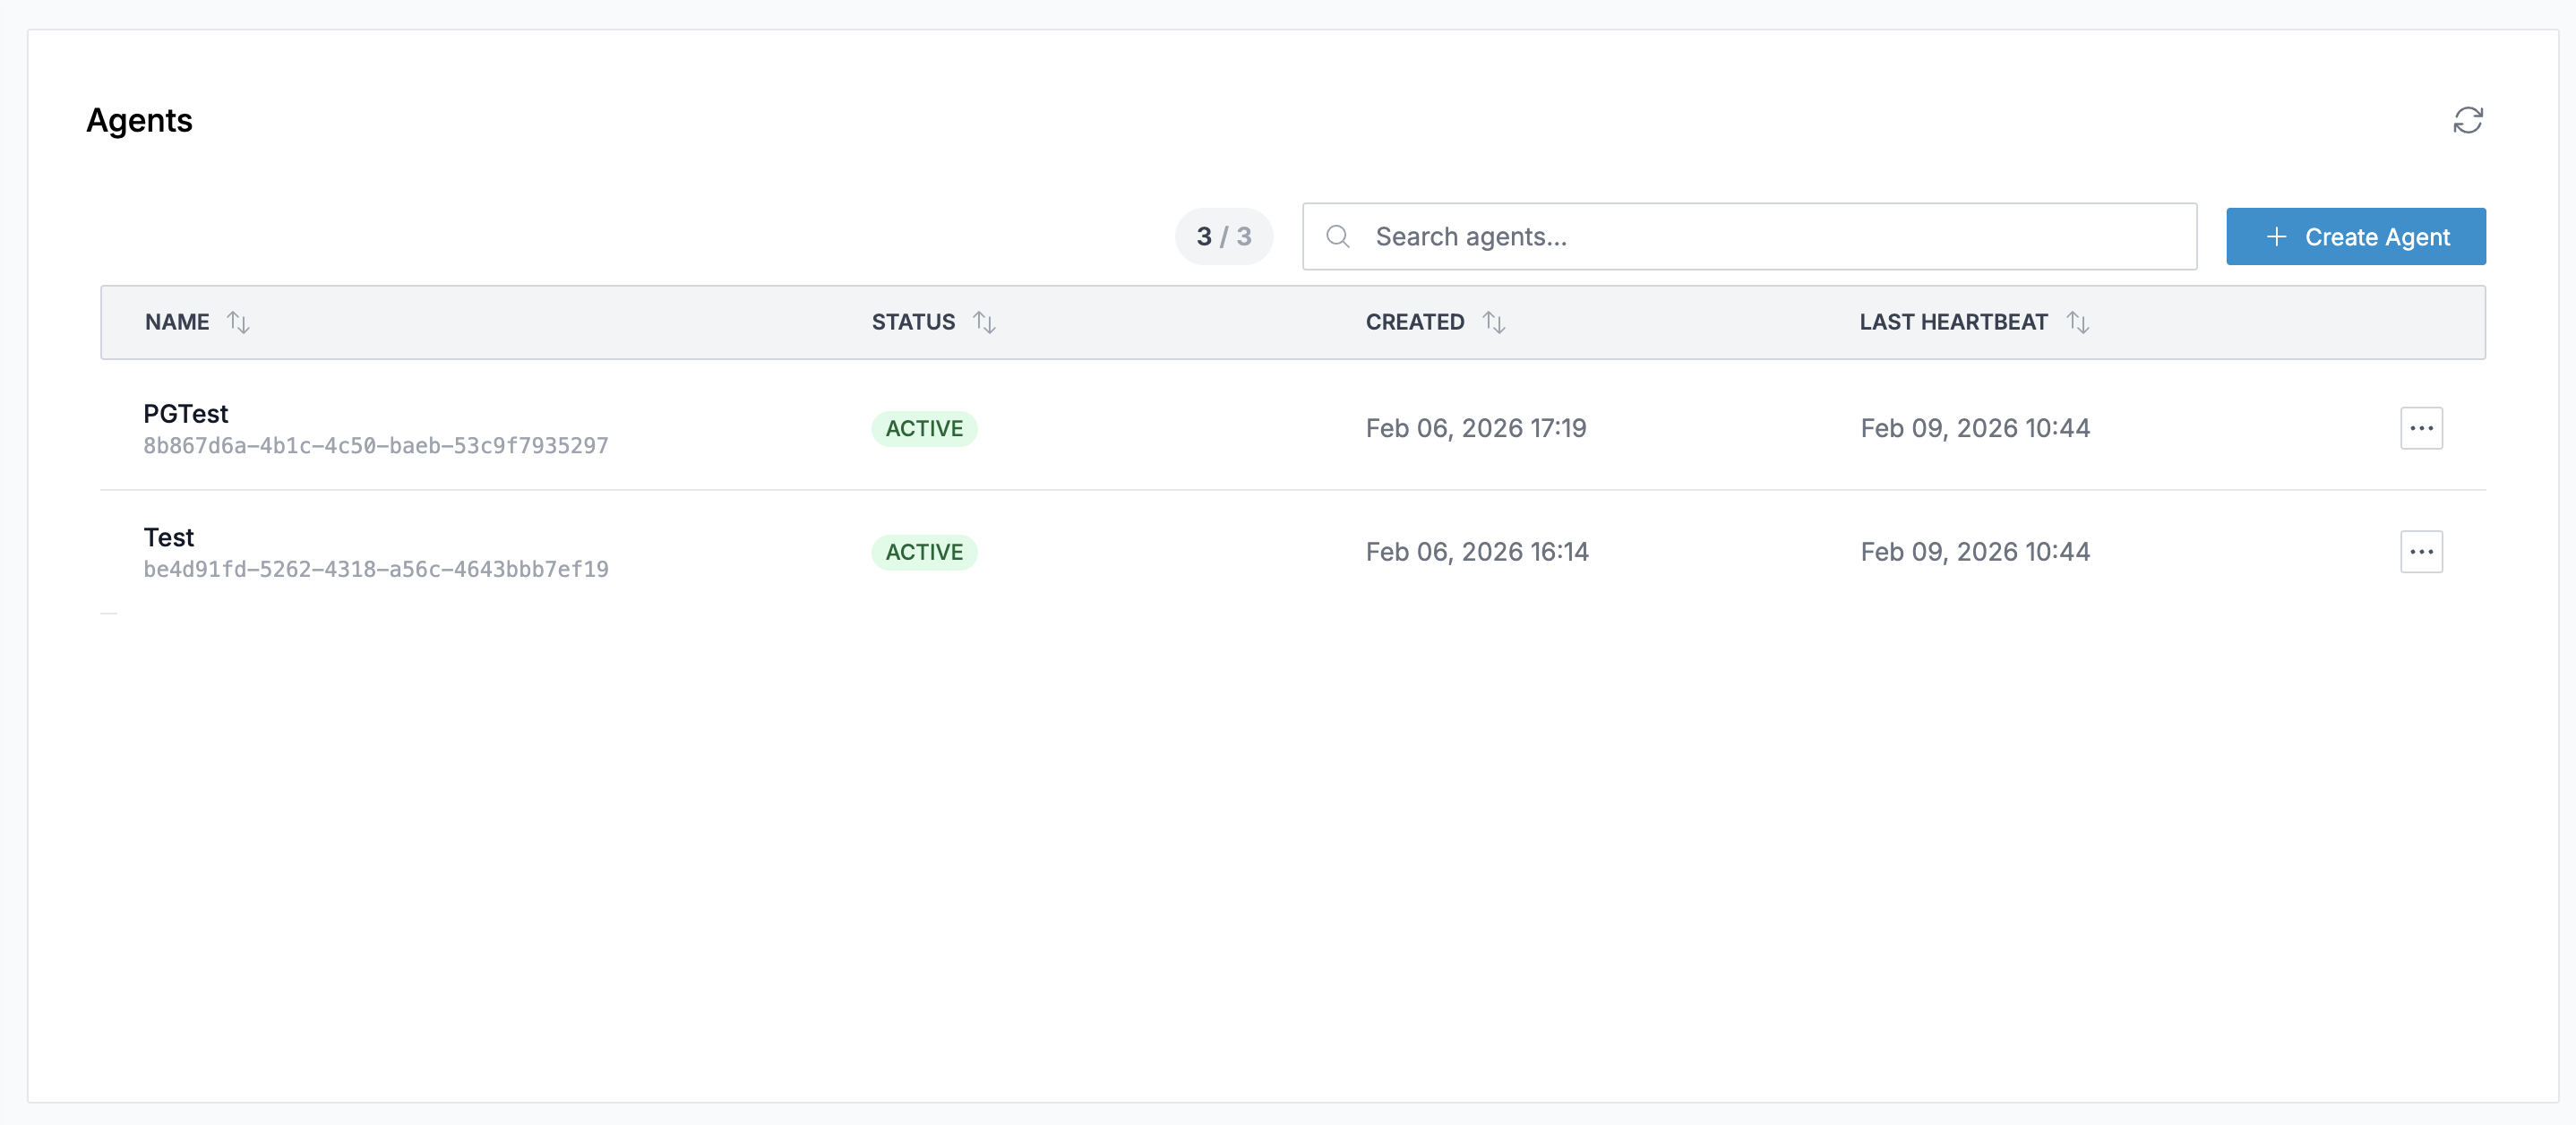
The Agents list page displays all registered agents with:
- Name: The agent name and its unique ID
- Status: Current connection status (
ACTIVEorDISCONNECTED) - Created: When the agent was registered
- Last Heartbeat: The most recent heartbeat received from the agent
Click on any agent row to open the detail drawer.
Agent Detail Drawer
Overview Tab
Shows creation time, last heartbeat, capabilities, and an embedded health dashboard with real-time metrics for the agent.
Datasources Tab
Manage Postgres datasources that are routed through this agent. Each datasource creates a corresponding Grafana Postgres datasource that tunnels queries through the agent to a private database.
Adding a Postgres Datasource
- Open the agent detail drawer and go to the Datasources tab
- Click Add Datasource
- Fill in the connection details:
- Datasource Name: A human-readable name
- Host: The private Postgres host and port
(e.g.
my-db.internal:5432) - Database: The database name
- User / Password: Postgres credentials
- SSL Mode:
disable,require,verify-ca, orverify-full - TLS Certificates: (Optional) CA cert, client cert, and client key for mTLS
- Click Create
Once created, a Grafana Postgres datasource is automatically provisioned. You can click Explore to query the database directly from Grafana, or use Save & Test to verify connectivity.
Uninstall Tab
Provides step-by-step commands to cleanly remove the agent:
- Uninstall the Helm release:
helm uninstall oodle-agent \
  --namespace oodle-monitoring
- Delete the Kubernetes secret:
kubectl delete secret oodle-agent-<agent-id> \
  --namespace oodle-monitoring
- Delete the agent from Oodle using the Delete Agent button
Deleting an agent disconnects all datasources and synthetic monitors routed through it.
Best Practices
Naming Conventions
Use names that identify the environment and cluster, e.g.:
prod-us-east-1staging-eksdev-local
High Availability
The agent maintains multiple connections for redundancy. If one connection becomes unavailable, traffic is automatically routed through another.
Network Requirements
The agent only requires outbound access on port 443 (WebSocket over TLS). No inbound firewall rules are needed.
Support
If you need assistance or have any questions, please reach out to us through:
- Email at [email protected]